Showing posts with label special feature. Show all posts

Monday, January 17, 2011

What I'm Working On

Remember the days when I used to post something new once or twice a week?
-
Those days are definately gone, but it's not because I'm producing less work than usual. I could still crank out a fully-rendered drawing a week. However, I've turned my focus to bigger projects - and lots of 'em! The only downside is the long periods of time where I have nothing to show.
-
That's why I decided to make this special post to show a few bits and pieces of all my various projects right now. All of them are works in progress, but it should give a bit of an idea what I'm spending my time on lately.

I. MousePaw: Word4Word

Not surprisingly, a great deal of time is going into MousePaw Games' latest game project, Word4Word, an educational game that teaches English skills. The kindergarden version Beta is projected to be finished in August of 2011 (Just in time to give to schools for testing. :))
-
I'm approaching the animation for the game by starting with the simplest things and working my way up. First on the list is the ambient animations, which basically have the characters staying in one place, but shifting around and blinking as part of the background while the player is doing something. I've uploaded two short clips to serve as examples:
-
Here are Alicia and Rebekah in ambient:


And here they are again, but this time in scuba mode!

After the ambients are finished for every stage, I will move on to the exiting and entering animations - and then finally the action and lip-sync as the characters interact with one another and with the player.

II. Vocaloid Art: Len & Rin Kagamine, Append ver.

By now, most of my blog visitors probably know how much I love Vocaloid, the software which allows users to create songs with virtual vocalists.
-
Len & Rin Kagamine were originally designed by character artist KEI, the same artist who designed my two favorite Vocaloid characters, Miku Hatsune and Luka Megurine. However, I did not love the Kagamines quite as much... that was until I saw their Append versions.
-
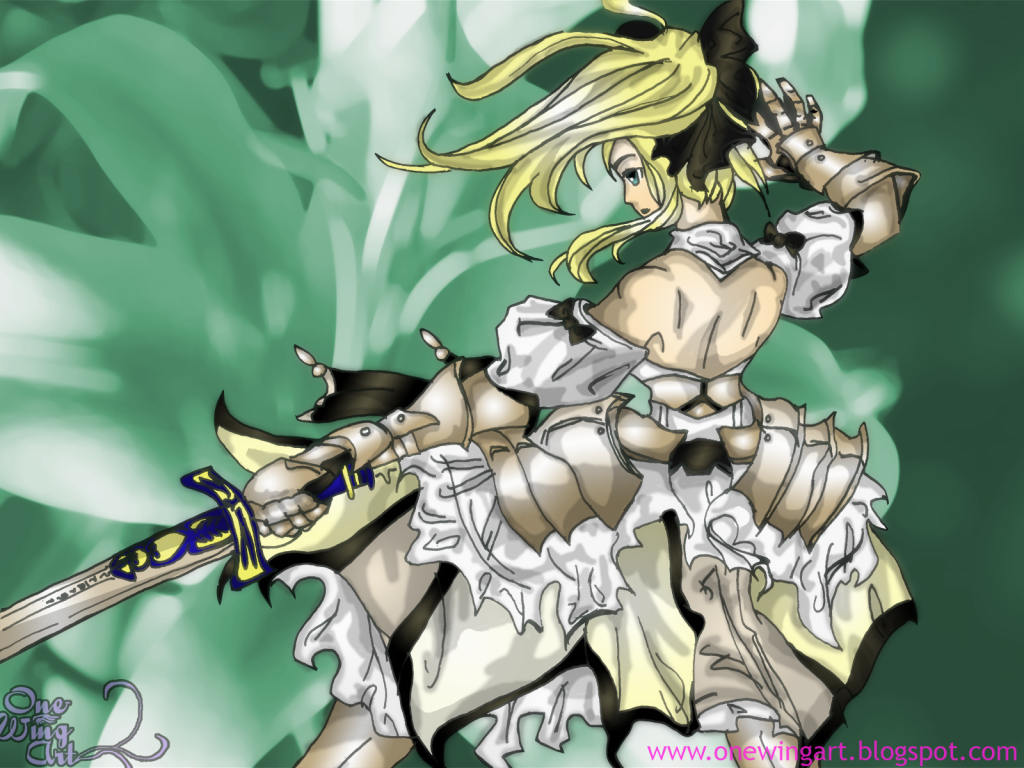
Miku's Append version, which served as an add-on to the original program, adding 6 new variations of her voice, was released about half a year ago. Besides increasing the realism of the virtual voice, Miku Append also came with new box art featuring the character Miku in a much more "technological" design. Now, last December on the Kagamines' 2-year birthday, their own Append version was released. I was absolutely amazed by the new box art and knew from the moment I saw it that I would have to draw them myself, and soon.
-
And so I began with Len:

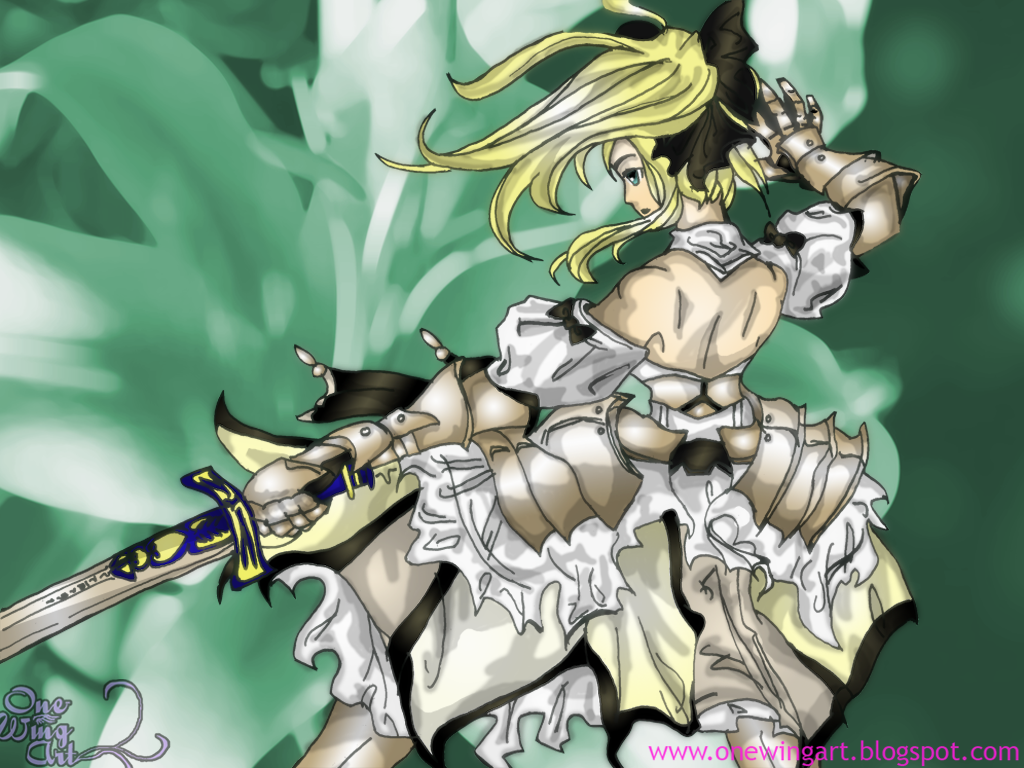
This Vector drawing may seem nearly finished, but it actually has a long way to go. Firstly, I plan to take it into photoshop and paint on more dramatic shading. And secondly:
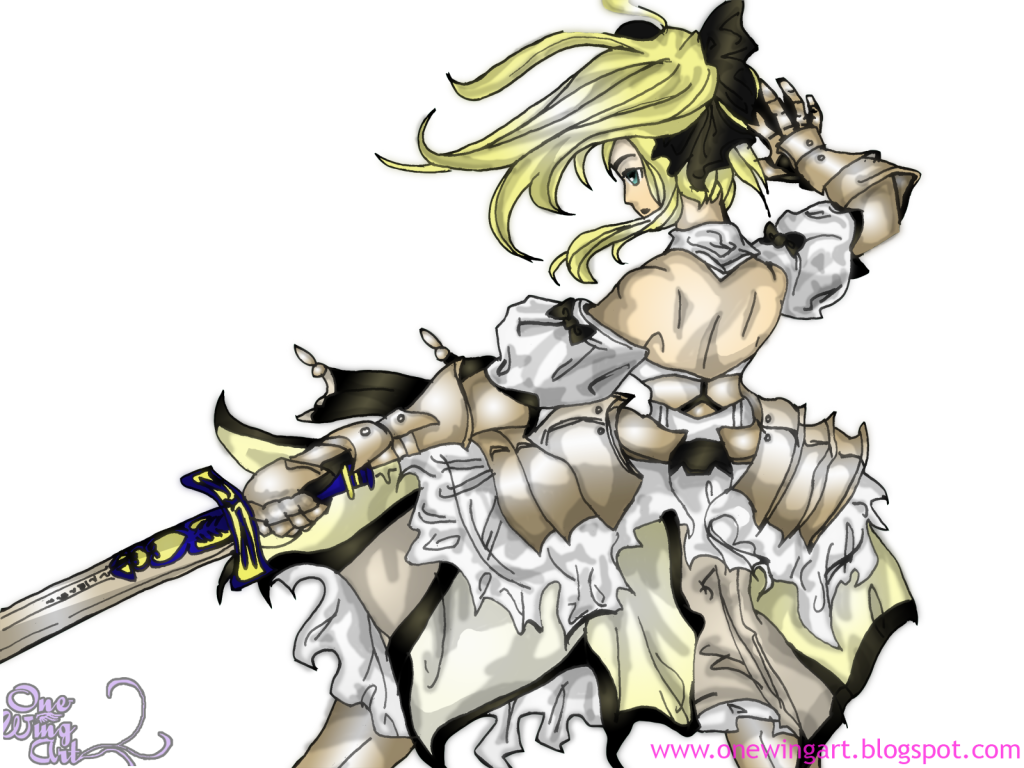
I have to add Rin!


Here is a rough idea of what the completed version will look like. Sing it, Kagamines!!!
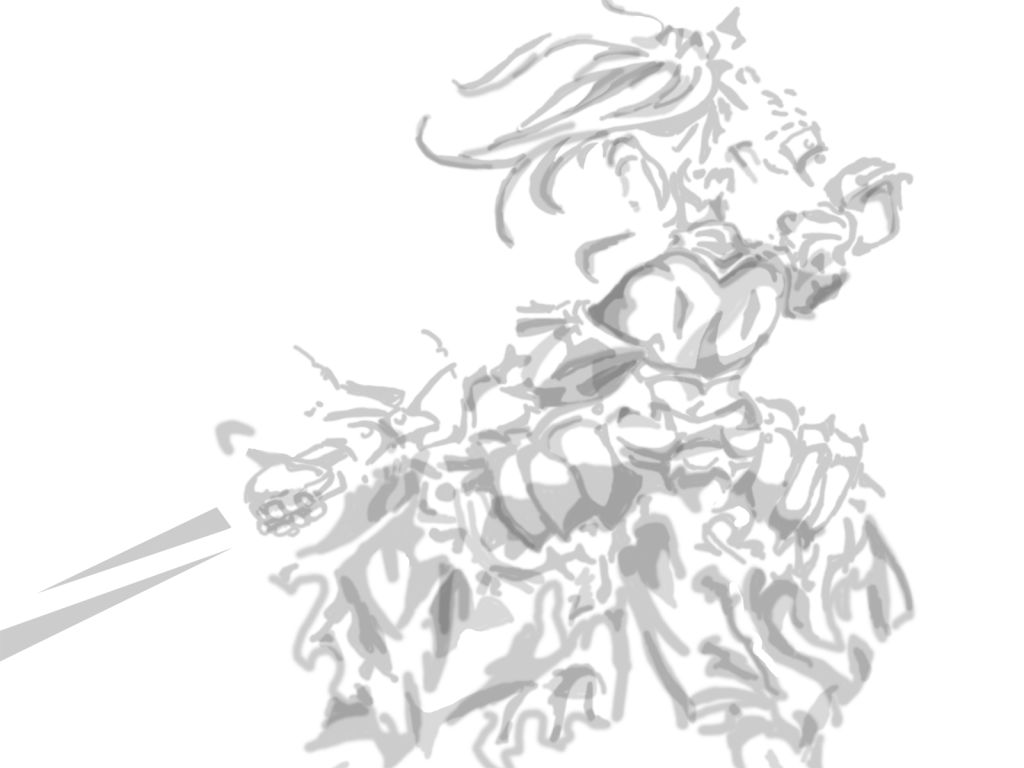
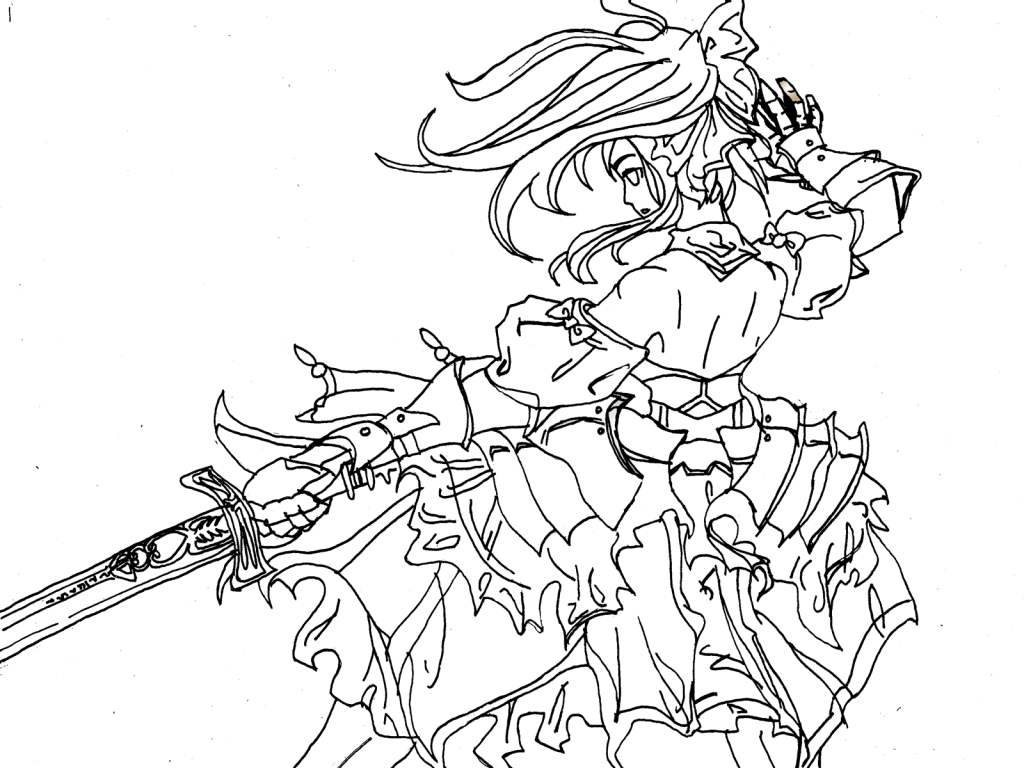
-
III. One-Wing 2011
Because it's just been too long since I've drawn my own character mascot... ^^;
-
Right now she's only in rough pencil phase. Hopefully I will get more time to finish her soon...but it probably won't be until after I finish the Kagamines.
No, the dress won't be transparent in the finished version. :P
-
I'm also doing a little bit more internship work for Shine Global in NY... however, I am not allowed to post any work online. But that is what I am working on! Please come back soon to see all of these projects once they are finished. :)

Monday, May 3, 2010

One-Wing Art DEMO REEL 1.0 !

Today, One-Wing's Gallery turns One-Year Old!! My very first post, "Introducting One-Wing," appeared on exactly this day, May 3, 2009.
-
That being said, how appropriate is it that one year later, I post the culmination of all my works, a 3-minute video clip of all my best in art and animation? And so, here it is... I've posted two previews for you, and now it's the whole thing. Click the screenshot to head on over to youtube and enjoy. :)


Or you can click here.
-
Keep in mind that this is only version 1.0, there will be many many versions to follow as I continue to make more works and update my reel with them.
The first change will no doubt be the replacing of one or both of the flash clips at the end, as they are too similar! I intend to make lots more flash projects over the summer :D
-
Now you guys, I want your feedback now more than ever before! This is what I'm going to show to potential employers and I need as much critique as possible to make it the best I can. Have at it! Does the music bug you? Are the transitions too fast? Should I show more things? Less things?
-
Thank you so much for giving me a reason to post all my works online for an entire year. I will do my best to continue to post quality work for you guys.

Wednesday, February 3, 2010

**Special Feature** The Story of an Image: From Conceptualization to Completion

Once upon a time, I had an idea.
-
About a year ago, I was considering the unique dynamic between a pair of characters who absolutely hate one another...and yet are irrepressibly drawn to one another at the same time. You know what I'm talking about - those characters that are "grr" one moment and then holding each other the next. I'm sure everyone knows a pair of characters (or real people!) that fit this description. ;) Anyhow, I decided to attempt to depict this. I failed.
-
Time and time again I found myself coming back to this idea, though. I could see it in my head, but if only I could get it down...
-
Then, finally, I drew this.
It was exactly what I was going for. The pose was dynamic and fluid, and the facial expressions showed ferocity while their proximity to one another communicated their undeniable attraction to one another.
-
Now to make them a little less naked.
As you might have guessed, these two are very specific characters of mine, and I've dressed them as such. However, I absolutely can't tell you who they are. It's a major spoiler of one of my novels... >w< But now that I've got everything penciled out as I want it, it's time to move on to inking:
And here it is, all cleaned up and ready for color.
Since the "opposites attract" dynamic is oh-so-much-fun to play with, why not dress one character entirely in white while the other in black? But it's not quite done yet. One more step to go - shading!
And there you have it - the finished image. "I don't know if I want to kiss you...or kill you." That's what they look like they're saying, to me. Hehe, as you can tell, it was a lot of work but I really enjoyed it anyhow - especially since it is the completion of an idea that I've been carrying with me for suuuch a long time. :)
-
You haven't seen the last of this pose, either. I know quite a few other characters that have the same love/hate dynamic going on, and I think I might see how they look drawn in this pose! And if anyone would like to suggest to me a pair of characters to draw in this pose, drop me a comment. I will more than likely go for it - maybe I'll even make a series.
-
That's all for now, but you know I'll post again soon ^.^
~One-Wing

Monday, December 14, 2009

One-Wing Cosplay Series #4 - Remilia

And One-Wing dresses up again, this time as Touhou's Remilia Scarlet. Though I know very little about the games, I confess that I love Remilia's design very much and had to depict One-Wing in her outfit. Remilia is the first character One-Wing has dressed as that really has wings -- and so I depicted her with a wing that looked like Remilia's rather than her usual feathered wing.
And of course she had to have a mischievous expression to match. :)

Saturday, December 12, 2009

[50th post!] One-Wing Cosplay Series #3 - Miku

50 Posts!!!!!
To celebrate, I decided to return to a series of drawings I began awhile ago, all which can be found here on my blog, of my muse One-Wing dressing up as various anime characters.
#1= Shinku from Rozen Maiden
#2= Saber from Fate/Stay Night
And now here's #3 = Miku from Vocaloid
I actually drew One-Wing as Miku around the same time as the other two but did not get around to coloring it until just yesterday. And even though I didn't spend all that much time on it, I think it looks pretty nice.
-
I admit it, I LOVE Miku. I have definately caught Miku fever just like half of the otaku community. I even have a plushie of her now, and listen to her music about 25% of the time (which is a lot considering how much I listen to music). This just goes to show how far a good character concept and design can go. I hope that someday maybe people will love my characters too - though their popularity will very likely not be as HUGE as Miku's. Hehe.
-
With Christmas break on its way, I am about to have a lot of time on my hands. And that means I'll be making a lot of art. And that means I'll be posting a lot of art. So come and visit often this Holiday season :)

edit - Apparently only 48 posts are listed on my blog page. That probably means I deleted 2 but they are still counted in my main count. Awww. Well I still am going to keep this labeled as the 50th. :P

Wednesday, October 28, 2009

*Special* Saber Lily Wallpaper (*High Quality*)

When I posted my One Wing Cover, I said that it might have been the most beautiful thing I've ever drawn.
Well, I think I've just one-upped myself, again.

Click here for full size:
http://i281.photobucket.com/albums/kk222/elusive_dreams/Blog/SaberLily1600x1200.png

This is Saber Lily. She is a character that appears exclusively in the Playstation 2 game Fate/Unlimited Codes which is based off the anime series Fate/Stay Night. Saber Lily is a redesign of the main character, Saber, based off the concept of "Saber as princess." And I have absolutely fallen in love with her design. Since the amount of Saber Lily art online is very limited, I felt compelled to depict her myself, and to try to capture her beauty, elegance, spirit, and strength.

And here it is - my attempt!

Since this picture is intended to be a wallpaper, I have made it for 3 different screen-sizes.
Click here to view it at 1600x1200: http://i281.photobucket.com/albums/kk222/elusive_dreams/Blog/SaberLily1600x1200.png
Click here to view it at 1280x960: http://i281.photobucket.com/albums/kk222/elusive_dreams/Blog/SaberLily1280x960.png
And Click here to view it at 1024x768 (My own screen size. Hehe): http://i281.photobucket.com/albums/kk222/elusive_dreams/Blog/SaberLily1024x768.png
-
Also, I've included different versions of the picture:

Saber Lily without the background
http://i281.photobucket.com/albums/kk222/elusive_dreams/Blog/SaberLilySansBackground.png
Saber Lily - shading only
http://i281.photobucket.com/albums/kk222/elusive_dreams/Blog/SaberLilyShading.png
And here's the original inked drawing (after I erased the pencil and cleaned it up.)
http://i281.photobucket.com/albums/kk222/elusive_dreams/Blog/SaberLilyDrawing1.png
-
I am very proud of this work and really hope it pleases all of you. If you like it enough to make it your wallpaper, this will make me especially happy.
Also, I'd like to dedicate this work to the people on e-shuushuu.com, the anime art site that I often visit for inspiration. This is where I first discovered Saber Lily.
-
Please visit again soon.
-
Side note: Blogger was being annoying today, thus the links to photobucket rather than embedded pictures. Sorry about that. It frustrated me to no end.

Friday, September 18, 2009

*Special* One-Wing Cosplay Series #2 - Saber

Here is the second drawing out of six from the One-Wing Cosplay series, where I depict my muse dressing up as some of my favorite characters in anime.

-

And this one happens to be my very favorite anime character of all, Saber from the awesome series Fate/Stay Night. Saber is a knight and a Servant summoned to protect the series' main character, Shirou.

-

This outfit I have One-Wing depicted in is the dress that Saber wears beneath her armor (for those of you who have seen F/SN but did not recognize it). It is my favorite of all of Saber's apparel and that is why I chose to draw One-Wing in it.

-

Again, this was another fun drawing to make! The only not-so-fun part about it was as I was coloring it in Photoshop, the program closed suddenly and of course I hadn't saved at all - so I had to start completely over again. Needless to say, I saved every other minute the second time around. ;)

-

If you haven't already, make sure you go see the first drawing in this series, where One-Wing dresses up like Shinku from Rozen Maiden! ^.^ Just click the words "special feature" in this post's annotations.

Wednesday, September 2, 2009

*Special* One-Wing Cosplay Series #1 - Shinku

Time for a special treat. (At least, I find it to be so.)
-
As you might imagine, I have been slaving away on Covenant Chapter Two, which now has an official release date - Saturday, September 5 (!!!) - but I don't like just working on just one thing or I tend to tire of it.
-
And so, I've decided to put together a fun series of drawings on the side. The story behind them is this: One-Wing is, as said in my introductory post, my muse: she gets credit for all of my inspiration, ideas, creativity, etc. And one major source of inspiration for me is anime. So, to represent this - and to have a lot of fun - I've decided to draw One-Wing dressing up as six different anime characters.
-
So here we have One-Wing dressed as the uber-kawaii living doll Shinku from the anime series Rozen Maiden. Just adorable <3
-
This was lots of fun for me (as well as a refreshing escape from Covenant for a little bit) and I look forward to drawing the other five of this cute series.

Monday, July 6, 2009

*Special* The Making of Covenant

Welcome all to a very special post I've been preparing for the sake of my blog visitors. Out of all of those who have taken a look at the first chapter of my Graphic Novel/Manga project, Covenant, many have asked me how exactly I went about doing it. Since I follow a step-by-step procedure, I figured it would work well to show pictures of one page as it goes through each of these stages, so you all can get the feel of what it is I do!
-
If that doesn't sound special enough to you, the page I have chosen happens to be from the yet-to-be released Chapter Two - Sealed Fate. In fact, it was specifically chosen to serve as a preview of sorts for the upcoming chapter. So, enjoy! And if any of you have not yet looked at Chapter One - Darker than Shadow, it's still here: http://covenantmanga.blogspot.com/. It shouldn't take very long to read; please take a peek :) And if the inconvienient formatting bothers you, I promise I am still looking for an easier way for people to read it.
-
So without further ado, let's begin.
The Making of Covenant
Step 1: Thinking up the Story
I can't very easily show you a picture that goes along with this first step, because it is all in my mind. This is the only step that I can do anytime, anywhere - and I do! Any time that I'm doing something that requires very minimal concentration, my mind drifts off to Covenant-land and either tweaks certain scenes I already have planned, or comes up with ideas for new ones. At the moment, I have about seven chapters almost completely planned, out of the twelve total that comprise this giant project I've decided to tackle. But anything not yet drawn out is still prone to change, which is one reason making a graphic novel is better than just working on a written novel as I so often do - I get plenty of time to tweak the scenes and twist the plot until it is ideal.
Step 2: Writing the "Screenplay"
During this step, I take the story that is in my mind and turn it into dialogue, typed up on Microsoft Word. Occasionally I add notes of what is happening as well, so all-in-all it turns out to be much like a screenplay.

Step 3: Dividing the Page
This part takes more thought than one would suspect. Once I have the dialogue all written out, I decide how much I want on each page, and then use a ruler and pencil to divide my page into sections ideal sizes for each frame.
Usually, this just consists of boxes, but as you can see on the page below, there is also the outline of a figure - occasionally, this must be done when I decide I have a drawing that I do not want to have in a frame, thus the drawing itself is the frame.

Step 4: Drawing Each Frame
Once sectioned out, I can draw each frame as I've imagined them in the previous step. This I do in pencil, freeing me to make as many mistakes as necessary before I am satisfied with the look. Dialogue bubbles are also drawn in, but remain blank.

Step 5: Inking the Drawings
A pretty self-explanatory step. I go over the pencil drawings with pen - only the lines I want to keep, of course.


Step 6 - Erase the Pencil & Add Bold Lines
Step 7 - Scan Onto My Computer
Also pretty self-explainatory. Adding bold lines is something I only recently started to experiment with. I really like their effect, and often use them to create emphasis or mood to a few frames. I try not to overdo it, however. As you can see, I have only used them on one drawing on this page.

Step 8 - Clean-up
Now we are in Photoshop. I admit this is the step I least enjoy. But it must be done, because there will always be remaining pencil lines and eraser dust on my newly scanned drawings that must be done away with before I can move on to the more interesting steps.
Step 9 - Add Flood-fill and Gradients
Now that our picture is all clean, we can add grey to the black-and-white lines. This takes lots of decision-making: I want the layout to be as visually pleasing as possible, and of course, something that portrays the story as I wish it to be told. I may not be the best at it, but this step is what really brings my characters and story to life. Usually I use flood-fill on the characters and gradients on the backgrounds.
I really like how the bold lines work well with the flood-fill greys. :)
On this page, I have also pasted in a scene from Chapter One on the bottom square to serve as a flashback!
Step 10 (Final Step) - Imputing Text
Only one thing left to do! And that, of course, is finally putting the text into those dialogue bubbles. Even this takes a bit of planning, though - I don't want the text to ruin the artistic layout of the page, so special tweaking is applied to each block of text until it fits in with the intended frame as seamlessly as possible.


And here you have it - the finished page! I'll leave it up to you to wonder what is going on here... but hopefully you have not forgotten Celia Cottonmeadow from the beginning of Chapter One. Apparently she has a big of a larger part to play in this one...

You'll be finding out the rest next August. :)